http considered harmful
How we got the green padlock of approval with the help of Let’s Encrypt.

Encrypted transport is rapidly becoming a requirement on the web, to the extent that this year Chrome will flag unencrypted (http://) sites as ‘hazardous’. Re-implemting the site seemed a good time to make this change.
Until recently, secured/encrypted communications required buying a certificate from one of a number of certificate authorities (CA’s) that were pretty expensive. There are various levels of security; the green padlock is the lowest level, and if you want to have your company name shown in the address bar there’s a lengthy process to go through to demonstrate that you physically own the company.

Getting all https-y with Let’s Encrypt
Let’s Encrypt is a free provider of HTTPS (SSL/TLS) certificates. It’s funded by industry; sponsors include Mozilla, EFF, Cisco, Chrome, and many others. They also accept donations. Let’s Encrypt allows you to implement basic HTTPS on your website for free, and it’s not too hard.
I started by downloading Certbot, a program to automate the generation and installation of the certificates issued by Let’s Encrypt, from the EFF. My particular variant of Linux (Amazon Linux AMI) did not have a fully-automatic installer but even then the process isn’t too hard. Basically the program communicates with Let’s Encrypt to generate a text key, which is then uploaded into your public web server. Let’s Encrypt then visits your site, and upon finding the key, certifies you as the owner of that site. The trust is based upon contol of the web server.
There’s just one command-line program to run, and here it is, edited for the interesting bits.
$ sudo ./certbot-auto certonly
Please enter in your domain name(s): idoimaging.com
Obtaining a new certificate
Performing the following challenges:
http-01 challenge for idoimaging.com
Input the webroot for idoimaging.com: /var/www/idoimaging/current/public
Waiting for verification...
Cleaning up challenges
Generating key (2048 bits): /etc/letsencrypt/keys/0001_key-certbot.pem
Creating CSR: /etc/letsencrypt/csr/0001_csr-certbot.pem
IMPORTANT NOTES:
 - Congratulations! Your certificate and chain have been saved at
   /etc/letsencrypt/live/idoimaging.com/fullchain.pem.
The program generates the keys, then asks where your public webroot is. In this case it’s a rails site so it’s /var/www/idoimaging/current/public. This is where the key is copied to temporarily, then letsencrypt.org is contacted to query my site, which happens very quickly. The resulting TLS certificate and key are stored on my system, and I configure my web server (nginx) to pick up the certificates. There are lines in there to specify which protocols are supported:
ssl_protocols TLSv1 TLSv1.1 TLSv1.2;
ssl_prefer_server_ciphers on;
ssl_ciphers "EECDH+AESGCM:EDH+AESGCM:AES256+EECDH:AES256+EDH";
ssl_ecdh_curve secasdfr1;
and lines to read in the certificates themselves:
ssl_certificate /etc/letsencrypt/live/idoimaging.com/fullchain.pem;
ssl_certificate_key /etc/letsencrypt/live/idoimaging.com/privkey.pem;
I also found very helpful this excellent tutorial on Securing NGINX with Let’s Encrypt on Digital Ocean. I think DO are getting great publicity from their tutorial series, which I often use. If I wasn’t already invested in AWS I’d certainly consider Digital Ocean as a hosting company.
In which we learn about HSTS
All is now good, and I have an encrypted website. But what happened to my blog? It’s hosted seperately as a static Jekyll site on AWS S3 with a CloudFront CDN front end. And I just broke it. Chrome’s not happy:

Safari can’t open it at all:

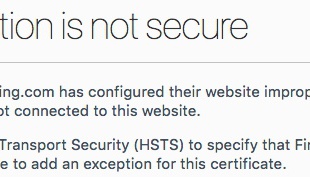
And Firefox and Vivaldi are really, really unhappy:


What’d I do? There were some clues in there, particularly the mention of HSTS. That’s a requirement that every page, including the first one, must be TLS-encrypted. And I’d left the blog as a plain http:// site in the thought that it would simplify matters. But what is causing the request to http://blog.idoimaging.com to be forced to https? Surely it couldn’t be related to the web server, they are completely separate services.
The answer came in the form of a lot of work and some outstanding replies to a long and plaintive plea on StackOverflow, where two people really helped me out. Thanks, Michael - sqlbot and b.b3rn4rd. HSTS, it turns out, is cached in the browser, and I must have configured the top-level domain to use HSTS, including subdomains. This explained why I was getting strange results - a browser that had never visited the website could see the blog OK with http, but upon visiting the website, then tried (unsuccessfully) to use https on the blog site.
All quick enough to explain but took some work. The culprit was a line in my Nginx config file:
add_header Strict-Transport-Security "max-age=63072000; includeSubdomains";
Strict-Transport-Security is the option to enable HSTS, and I’d copied it in blindly from the Digital Ocean tutorial. Usually it’d be fine, but as I am running the blog entirely separately from the website, the browser was carrying it over to an (in my eyes) unrelated site.
So I took the includeSubdomains directive out, restarted, but not still it won’t work. Turns out HSTS sticks to your browser like a limpet, and clearing history won’t get rid of it. Plus, the expiration date is a year in the future. With Chrome, you can visit chrome://net-internals to view and clear HSTS settings, but I can’t clear Safari. Still, the only browsers affected are those that visited the site while it was misconfigured. It does leave me in the rather ironic situation, though, of being the only person in the world who can’t read my blog.